This is a quick manual for Jetbot.
Manual
Building local network
You need to prepare an HDMI cable, a keyboard, and a monitor for building a LAN (using a mobile hotspot will do). Connect the power of the Jetbot and connect the display to the HDMI port of the jetbot. Once the Jetbot's system has successfully booted, use the command line to connect your cell phone hotspot. Don't worry, the Jetbot is the internal equivalent of a Linux OS computer. All you need to do to connect your mobile hotspot is to enter the following command.
sudo nmcli device wifi connect <SSID> password <PASSWORD>
Note that you need to change <SSID> to the name of your hotspot and <PASSWORD> to the password of your hotspot to connect successfully. For example:
sudo nmcli device wifi connect s22u password 12345679
Here s22u is the name of the mobile hotspot we set before, and 12345679 is the password of the hotspot (you can also change the name of your mobile hotspot to s22u password 12345679 directly, so that the jetbot can connect to your mobile hotspot automatically without a computer screen).
Launch jupyter notebook
Here is an example using a laptop, make sure the jetbot is connected to the same mobile hotspot as the laptop, use the laptop to open a browser and type in the following URL to access.
http://<jetbot_ip_address>:8888
Here
http://192.168.35.24:8888
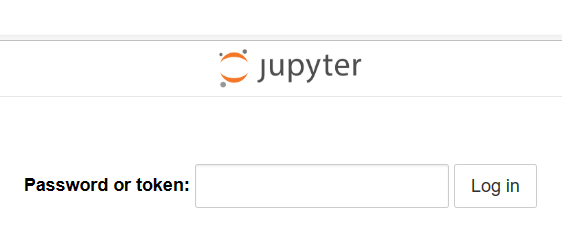
After successful connection, the following screen will be displayed, and you can successfully connect your laptop to the Jetbot by entering the password: jetbot
Now you can use your laptop to control the Jetbot!
Deployment Road Following
After you have successfully logged into jupyter notebook you will usually see the following files.
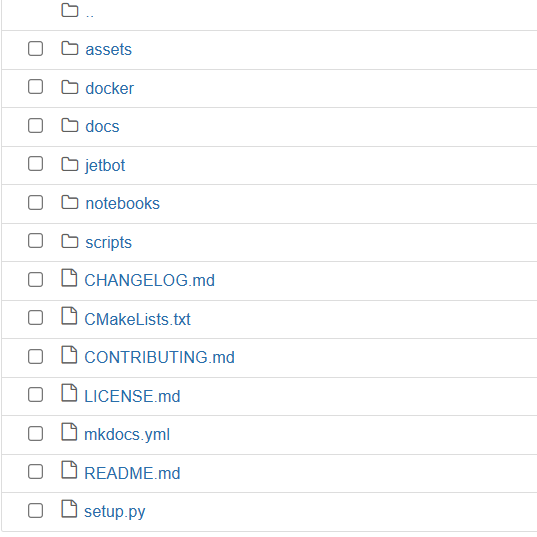
Put together the road we printed before and put Jetbot on it. After opening the notebooks folder, open the road_following folder and finally open the live_demo.ipynb file. From top to bottom, click the run button at the top for each selected block of code. Keep running until the 10th block of code in the figure below finishes.
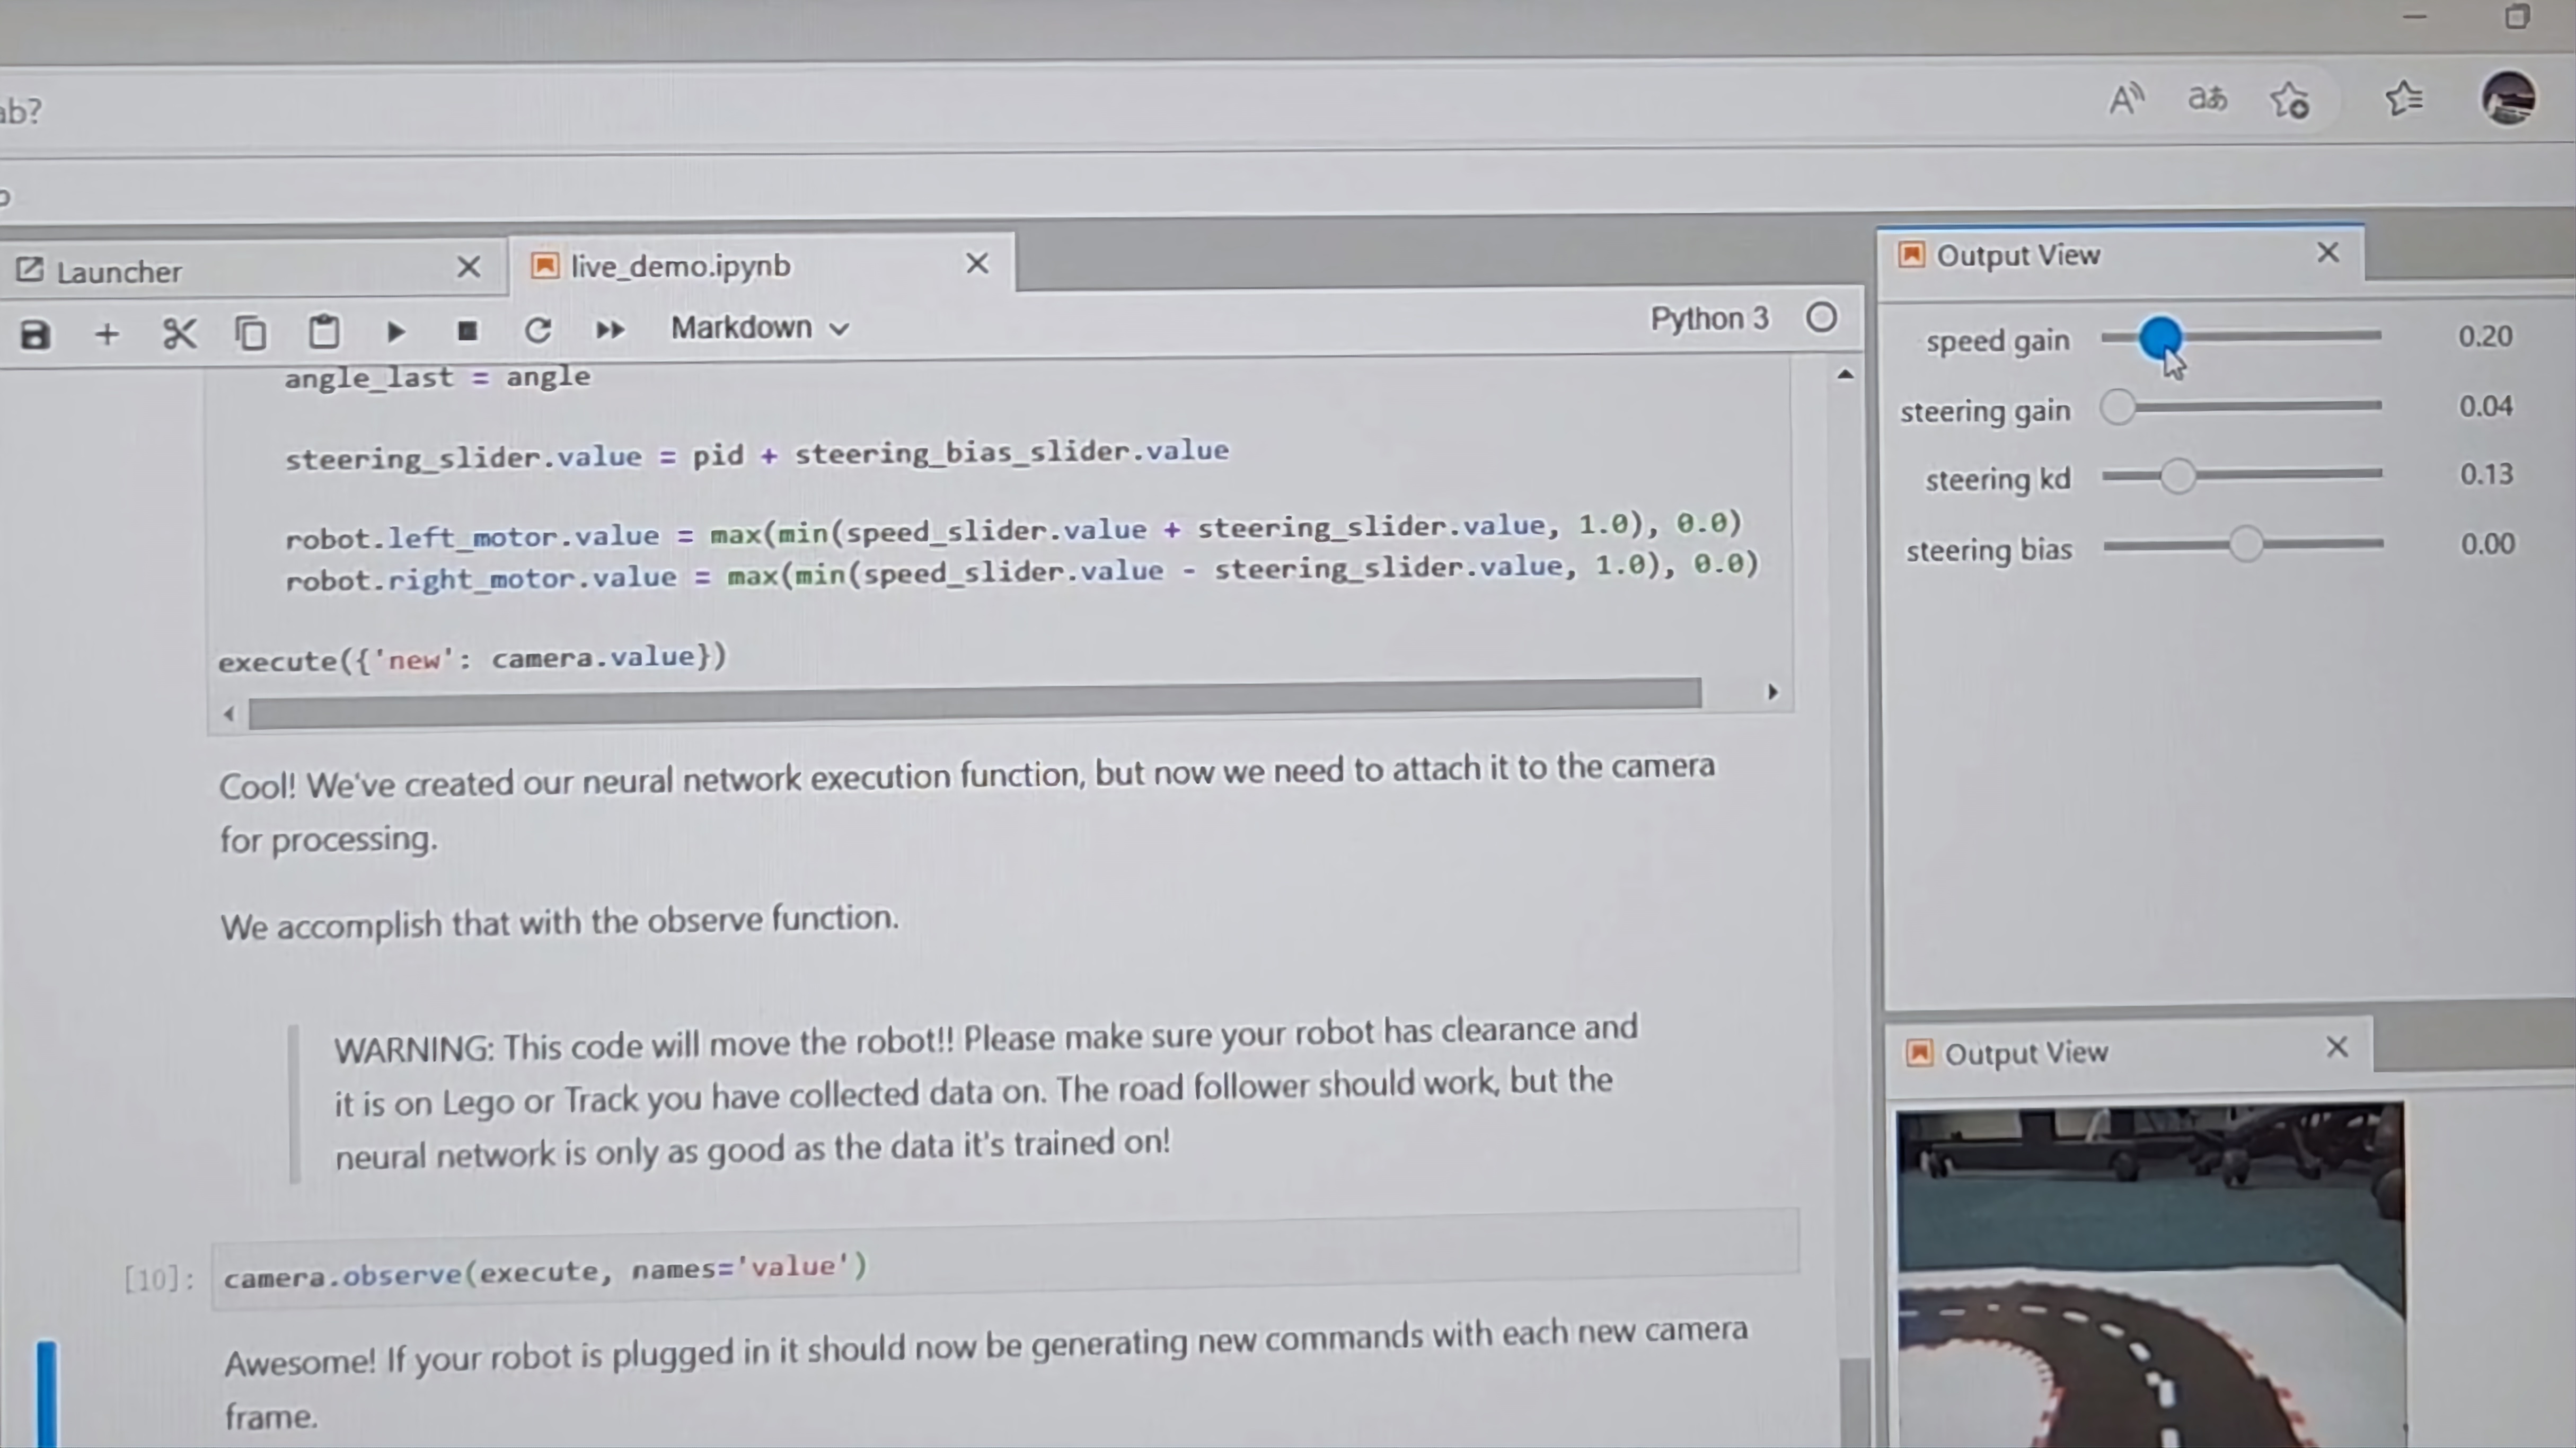
At this point you can adjust the parameter controller generated above to achieve auto-tracking of the cart. Our recommended parameters are
Speed gain 0.20
Steering gain 0.03~0.04
Steering kd 0.10~0.13
Steering bias 0.00
Note that the speed gain is set to 0, and when all other parameters are set, then the speed is set to 0.20 to drive the jetbot. when everything is set, you have a jetbot that drives itself! When you want to shut down the Jetbot, set the speed gain to 0 and then run the last two code blocks in sequence. Finally, you can disconnect the Jetbot from the power supply.
__END__